Introduction:
Learn how to install WordPress in Plesk using the WP Toolkit. This user-friendly tool simplifies the process, allowing you to set up a WordPress website quickly and efficiently.
Approximately 20 Minute Process
Step-by-Step Guide
1. Login to Plesk via your Zeniar Portal
2. Click on WordPress from the left toolbar

3. Click on the Install button located at the top to display the setup wizard
![]()
4. Enter the installation path for your site. By default it will install at the base of your domain. This means visitors to your site will go straight to WordPress.

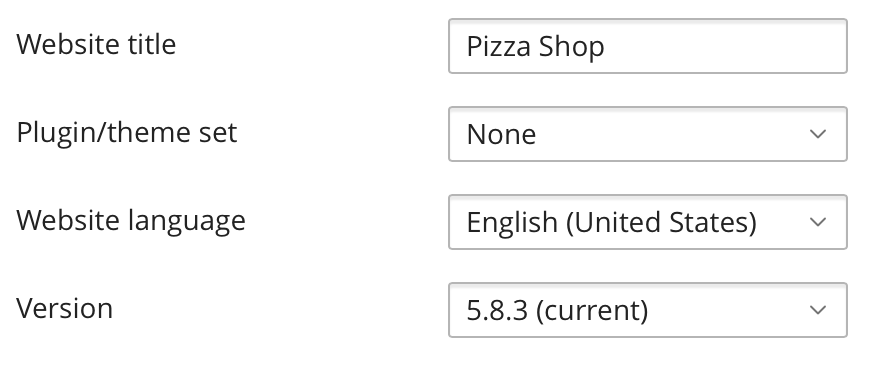
5. Enter a title for your site
![]() If you wish to install an older version of WordPress, you can do so by selecting the Version drop down menu
If you wish to install an older version of WordPress, you can do so by selecting the Version drop down menu
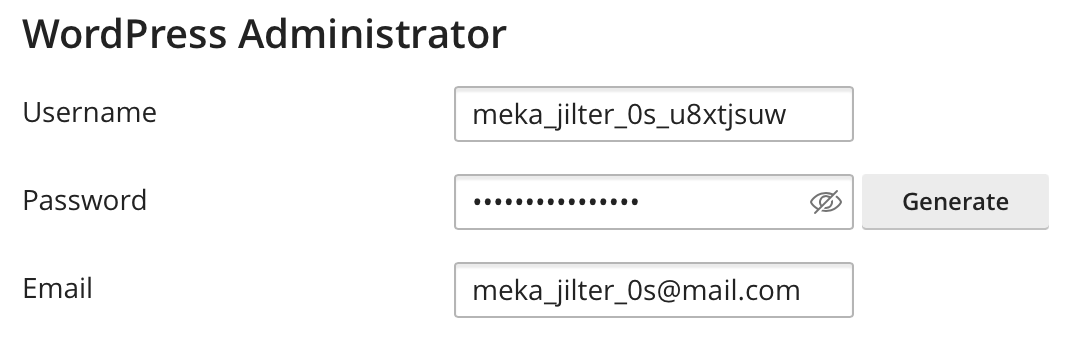
6. The administrator account information will be randomly created based off your details for security reasons. If you wish to set this manually, you can do so here
![]() You will be able to login automatically from your Zeniar Portal using Single Sign On (SSO)
You will be able to login automatically from your Zeniar Portal using Single Sign On (SSO)
7. Database and Automatic Update settings are configured automatically for best security by the server. If you wish to set this up manually, you can do so by selecting the drop down menus

8. Once you are happy with your configuration, select the Install button located at the bottom
![]()
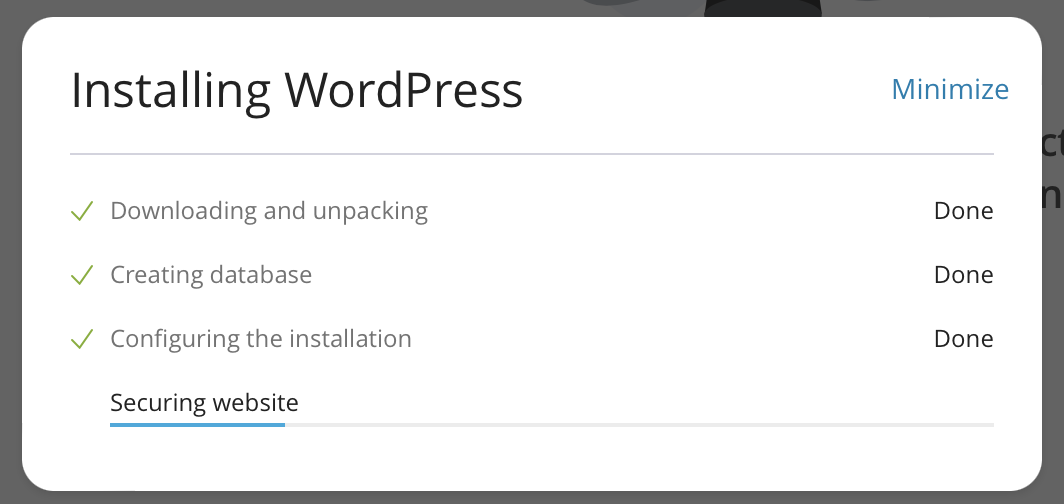
9. A progress indication will be displayed in the bottom right, selecting Detailed Progress will display the current progress window
10. Once the installation is complete, you will be displayed with a Installation Completed window
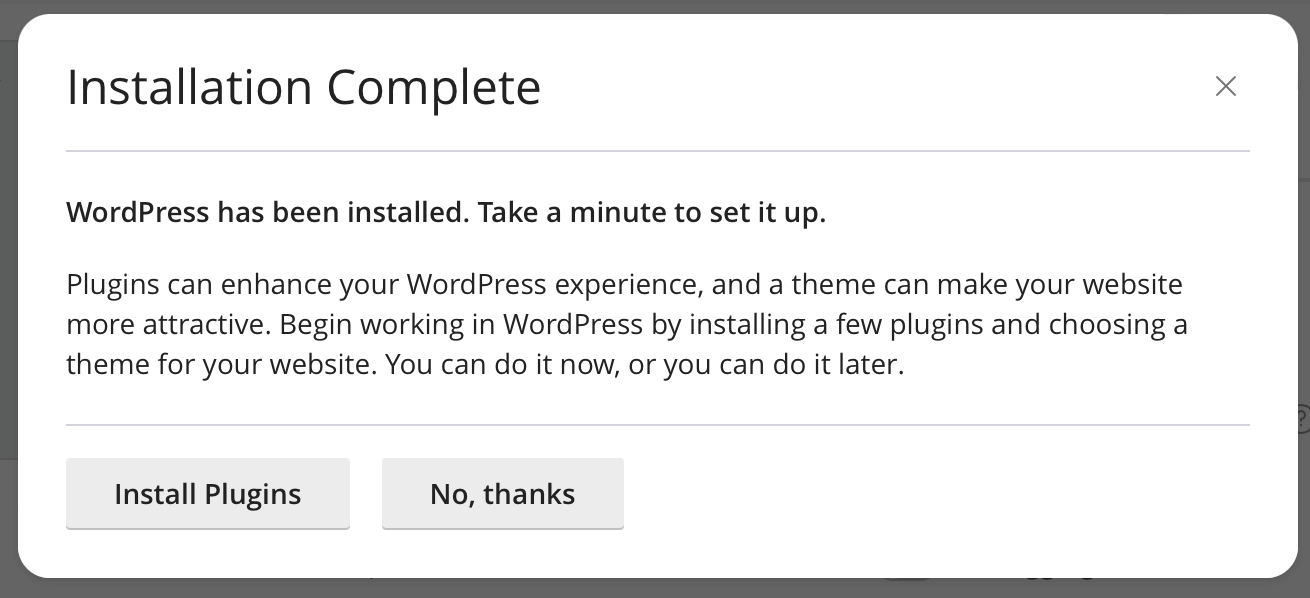
Your installation is now complete, you can now login to the WordPress site.
Require additional assistance?
Our dedicated Australian support team is ready to help. Reach out to us via email at support@zeniar.com or by submitting a support ticket through your Zeniar Portal.

