Introduction:
Grant access to team members or other users with ease through the portal dashboard. Customize their access permissions to restrict certain responsibilities, ensuring secure and tailored access to your monitoring platform.
Approximately 15 Minute Process
Step-by-Step Guide
The following instructions guide both you and the invitee through the entire process of sending and accepting the invitation.
Adding an additional user
1. Log into your account at https://zeniar.com
2. Select + New Contact from the left side bar

3. Select User Management from the left side bar
![]()
4. Click on Invite New User button located to the right

5. Enter the email address of the user you would like to invite. In this example, we will use team@zeniar.com

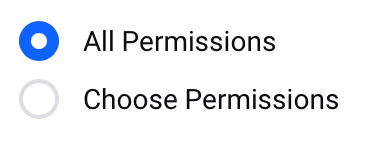
6. Select if you would like to grant the user permission to your entire account or restrict access to only certain parts
![]() If you grant All Access, the contact will have access to your entire frontend service, contact & billing information
If you grant All Access, the contact will have access to your entire frontend service, contact & billing information
7. Once complete, click on the Send Invite button to send the registration email to your new contact

Accepting the invite
1. Your new user will receive an innovation email that they must accept within 7 days
![]() Your contact will need to register a new account if they dont have an account already
Your contact will need to register a new account if they dont have an account already

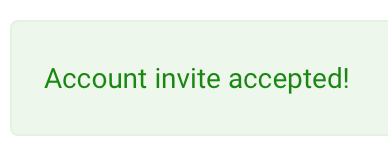
2. Once they have accepted the invite / registered for an account, they will see a successful message advising the invite has been accepted
3. Please ensure that your new user confirms their email address for security reasons
Require additional assistance?
Our dedicated Australian support team is ready to help. Reach out to us via email at support@zeniar.com or by submitting a support ticket through your Zeniar Portal.

