Introduction:
Learn how to create a new email account using your custom domain name with Plesk. This guide will walk you through the steps to set up personalized email addresses, allowing you to communicate professionally and efficiently.
Approximately 15 Minute Process
Step-by-Step Guide
1. Login to your Zeniar account and go to Services located on the main page

2. Select your active service plan
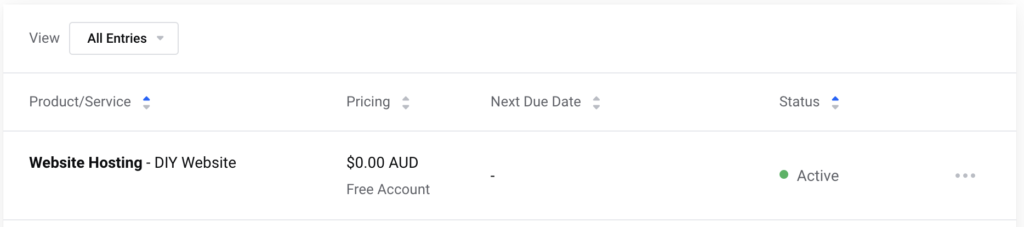
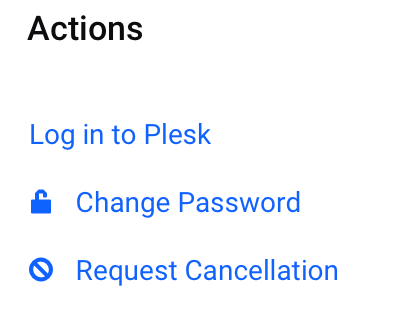
3. Select Login to Plesk Control Panel
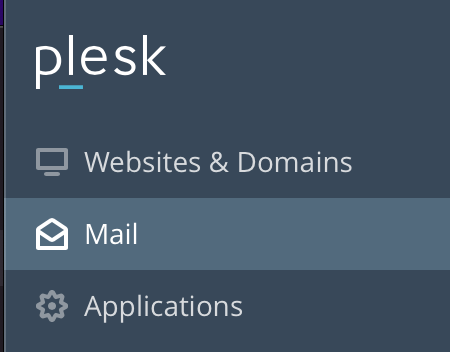
4. Select Mail from the left menu bar
5. This will now show a list of all your active email accounts. To add a new account, select Create Email Address

6. Enter the address that you would like for your email account as shown below. For our example we will use support@mysite.zeniar.com

7. Enter a strong password for this email account (You can always change it later in Webmail)
![]() For optimal security, we highly recommend utilizing the "Generate Password" function to create a unique password.
For optimal security, we highly recommend utilizing the "Generate Password" function to create a unique password.

8. Press the OK button at the bottom to create the email address

9. A message will be displayed at the top once the account is created.
![]()
You can now login to your account at https://webmail.zeniar.com or my setting your email account up on your phone or PC.
Require additional assistance?
Our dedicated Australian support team is ready to help. Reach out to us via email at support@zeniar.com or by submitting a support ticket through your Zeniar Portal.

